RSS

Tag Archives: maker EDUcation

Grove Beginner Kit for Arduino | SEEEDSTUDIO | First Steps with the Arduino-UNO R3 and NANO | Maker, MakerED, Maker Spaces, Coding

Grove Beginner Kit for Arduino | SEEEDSTUDIO | First Steps with the Arduino-UNO R3 and NANO | Maker, MakerED, Maker Spaces, Coding

.

.


Grove Beginner Kit for Arduino | SEEEDSTUDIO |

SEEEDSTUDIO asked me through LinkedIn to make a cooperation with them for reviewing a NEW Arduino, the “Grove Beginner Kit for Arduinoproduct which I accepted. Today I received the stuff which in the next days I will play around a bit and create Blog posts (Tutorials) about it, stay tuned…

FIRST impressions:

I ordered it on 28-07-2020 on the site of SEEDSTUDIO and it arrived on 03-08-2020 @02H58 PM, delivered by DHL. Actually very quick from China to Luxembourg!!

Unpacking my order:

Nice cardboard with lots of TIPS printed on it. The box is sealed with 3 circular glued plastic which I had cut through with scissors, BAD IDEA, as I damaged the cardboard while NOT knowing that the box was meant as a whole playstation as itself (see photos, please)… Here the company could improve please, thanks! My constructive critics! 😉

.


Click image, please, to enlarge.


Click image, please, to enlarge.


..
.
Mausi-idée

.

.

As long as that glued plastic problem ISN’T resolved, use a sharp cutter to cut off the glued circular plastic as I couldn’t remove it by hand!

.


Reading the online Manual

Well, NOTHING to say against it, it is well done!! Please check it here below:

There are professional STEP-BY-STEP instructions so you can’t make mistakes!!

.


Getting started

ALL you have to do is to connect the USB-Cable to the PC, Laptop, which is in the right sight of the box (see step 2 in the PIC below please) to start. [Start Text from WiKi] Grove Beginner Kit for Arduino is one of the best Arduino Beginner Kit for beginners. It includes one Arduino compatible Board and 10 additional Arduino sensors and all in one-piece of PCB design. All the modules have been connected to the Seeeduino through the PCB stamp holes so no Grove cables are needed to connect. Of course, you can also take the modules out and use Grove cables to connect the modules. You can build any Arduino project you like with this Grove Beginner Kit For Arduino. [End Text from WiKi]

.

Click image, please, to enlarge.

.


Plug and Play Unboxing Demo

The Grove Beginner Kit has a plug and plays unboxing demo, where you first plug in the power to the board, you get the chance to experience all the sensors in one go! Use the button and rotary potentiometer to experience each sensor demo!

  • Scroll -> Rotating Rotary Potentiometer
  • Select -> Short Press Button
  • Exit Current Demo -> Long Press Button

Buzzer and LED module are used for key prompt.

.


Some examples

Please check the pictures below:

.

Temperature/Humidity GROVE

Click image, please, to enlarge.

3

Air Pressure/GROVE

Click image, please, to enlarge.


Air Pressure/GROVE

Air Pressure/GROVE

Click image, please, to enlarge.


.


My review

Well, I can recommend this product for beginners by 100%!! Up from the beginning beginners can find out HOW things work with just plugging the USB cable to the PC, Laptop, computer. It’s a GREAT way to bring Coding to STEAM students, Maker’s, MakerED and Maker Spaces!

I didn’t yet using the Breakout possibilities, I DON’T overwhelm you with TOO MUCH information, that will GET discussed in next tutorials, BUT looks promising as NO need to plug single cables, ALL done by ONLY one connector!!!

.

Please check the videos below to understand how the GROVE System works.

..


WHERE to order it?

You can GET it here actually (04-08-2020):

..


.

Mausi-idée

.

TIP for Educators, Teachers, Coaches:

Let the learners first trying the working examples in the box to discover the possibilities! Later you can make the Breakout and then they can reproduce the Coding examples such as mentioned in the online manual.


.


L’auteur Gust MEES est Formateur andragogique / pédagogique TIC, membre du “Comité Conseil” de “Luxembourg Safer Internet” (LuSI), appelé maintenant BEESECURE, partenaire officiel (consultant) du Ministère de l’éducation au Luxembourg du projet  ”MySecureIT“, partenaire officiel du Ministère du Commerce au Luxembourg du projet ”CASES” (Cyberworld Awareness and Security Enhancement Structure)..


The author Gust MEES is ICT Course Instructor, ”Member of the Advisory Board” from “Luxembourg Safer Internet” (LuSI), BEESECURE, Official Partner (Consultant) from the Ministry of Education in Luxembourg, project “MySecureIT“, Official Partner from the Ministry of Commerce in Luxembourg, project “CASES” (Cyberworld Awareness and Security Enhancement Structure).

.


.

Stay tuned for next blog post(s) 😉

.

.

.


Tags: , , , , , , , , , , , , , , , , , , , ,

CitiZEN-Science: The PracTICE

CitiZEN-Science: The PracTICE

.

.


CitiZEN-Science: The PracTICE

Through the Maker-Movement and IoT (Internet of Things) there is already a LOT happening and different Networks are collecting Data through Sensors and make them available for everybody to have access and study them! Such sensors are e.g.:

  • Air Quality
  • Meteo
  • Street traffic
  • Radiation
  • People (counter) traffic
  • Water Quality
  • Wind velocity
  • Radar for excess of car speed
  • Inundation prevention
  • Observations on:
    • Nature (birds, etc.)
    • Archaeology discovering

Those, above mentioned  applications can even be assembled together and so being a precious source for communes and Governments! Mostly such projects are done with an ARDUINO and/or Raspberry PI based micro controller and a mini computer: The main difference between them is Arduino is microcontroller board while Raspberry PI is a mini computer.

Thus meaning: that fits perfect for the Maker-Movement and could GET integrated easily into STEM projects! 

Well, after following for a long time different possibilities on the How-To to get globally access to such IMPORTANT Big-Data for everyone, I found out THAT “The Things Network” is a perfect way! Please find below the address and the projects:

It is based on the “LoRaWAN“, check below, please, for more information:

Blog post will GET updated and/or new ones will get posted as it is a very interesting Movement! Stay tuned 😉

Meanwhile check the beginning of this blog post, please:


.

Key words necessary for me to create this blog post: CitiZEN-Science, STEM, MakerED, Maker-Spaces, PracTICE, LEARNing-By-Doing, TTN, The Things Network, Arduino, Raspberry PI, LoraWAN, SigFox (Low Power consumption…)

.

L’auteur Gust MEES est Formateur andragogique / pédagogique TIC, membre du “Comité Conseil” de “Luxembourg Safer Internet” (LuSI), appelé maintenant BEESECURE, partenaire officiel (consultant) du Ministère de l’éducation au Luxembourg du projet  ”MySecureIT“, partenaire officiel du Ministère du Commerce au Luxembourg du projet ”CASES” (Cyberworld Awareness and Security Enhancement Structure).


The author Gust MEES is ICT Course Instructor, ”Member of the Advisory Board” from “Luxembourg Safer Internet” (LuSI), BEESECURE, Official Partner (Consultant) from the Ministry of Education in Luxembourg, project “MySecureIT“, Official Partner from the Ministry of Commerce in Luxembourg, project “CASES” (Cyberworld Awareness and Security Enhancement Structure).

.
.
Stay tuned for next blog post(s) 😉

.

.

.


1 Comment

Posted by on January 13, 2020 in 21st Century Skills, 21st-Century-Teaching-and-Learning, Adaptive Learning, Analyzing, Arduino, BEE CREATIVE, Better Learning, Better Learning about ICT, Better Teaching, Big Data, CitiZEN Science, Coaching, Coding, Collaboration, Collaborative Learning, Collective Intelligence, Competency, Concept, Connected Educators, Creating Mind, Creativity, Critical Thinking, Design Learning, Digital CitizenShip, Digital Footprint, Digital Intelligence, Digital Lëtzebuerg, Digital Luxembourg, Digital4EDUcation, DQ, Education, Education 4.0, eLeadership, eLearning, Electronics, Electronics Tutorials, Engagement, Entrepreneurship, Environment, EQ, eSkills, ESP8266, Ethical Mind, ethics, Europe, For a Better World, Free courses, Future Work Skills, Global, Global Collaboration, growth mindset, Holistic view of EDUcation in the future, Home-Work, HowTo, Innovation, Internet Of Things, IoT, Key Instructors, Leadership, Learning By Doing, Learning to Learn, LoRaWAN, Luxembourg, maker, Maker PracTICE, MakerED, MakerSpace, MakerSpaces, Modern EDU, Motivation, NodeMCU, Not ONLY rights but also responsibilities, Often Asked Questions, Open Mind, Personal profit, PKM, PLN, PracTICE, Proactive Thinking, Professional Development, Professional EDUcators TEACHers, Project Based Learning, Quality Courses, Reality, Reflecting, Respectful Mind, Responsibility, Right use of Technology, Rise Of The Professional Educator, Science, Skills, STEM, Student Centred, Students 21st Century Survival Guide, Sustainability, Synthesizing Mind, Teacherpreneurs, Technology Integration, The Things Network, TTN, understanding, Understanding the internet


Tags: , , , , , , , , , , , , , , ,

First Steps with the Arduino-UNO R3 | Maker, MakerED, MakerSpaces, Coding | EASTER Egg with NeoPixels WS2812B

First Steps with the Arduino-UNO R3 | Maker, MakerED, MakerSpaces, Coding | EASTER Egg with NeoPixels WS2812B

.

.


EASTER Egg with NeoPixels WS2812B made from cardboard

.

.

Soon there will be EASTER and decorations are getting put around the house worldwide as it is tradition since ages to do so. That’s also the time for tinkerers, makers to GET some new ideas. Well, I thought on a project which everybody could do without having a 3D-Printer NOR a Laser cutter at home and not having access to them on other places. SO, I tried out to create a EASTER-EGG from cardboard using an Arduino UNO and Neopixels…

I recently bought 1 Meter of Neopixels WS2812B with 60 LEDs and tried it out while wife was looking at it and she told me if that wouldn’t be an idea for making a Easter-Decoration, e.g. an egg. I took that challenge and a day later it was working, LOL 😉 I used a 3,5 mm thick cardboard from a red wine box which was stable enough to create the project.

I copied an image (the orange egg) from an Easter-Egg which I found on the internet (license-free), glued it on the cardboard and cut it out.


You may have a look on this Tutorial to know a bit more about the handling of Neopixel LEDS, please:

The project itself by cabling is actually VERY easy, ONLY 3 wires, the MOST work is on the mechanical part by cutting the cardboard, painting, soldering the Neopixels WS2812B strip and to put everything into a box with the necessary parts, while drilling, etc. WE will see this in detail by following PICS… But first let us solder and interconnecting the Neopixels LEDs strips, you need to follow the arrows on the strips to connect each of the LED strips, thus meaning: see PICs please:

Follow the arrows

.

.

Once all the LED strips are interconnected, you can connect the other 28 LEDs to the point marked with “START” and connect them to the ARDUINO UNO board through a screw terminal to make the first tests. Please check the tutorial below with the code for the How-To:

IF everything is working, hopefully, we can go for the integration of the components into a housing. TIP: prepare the ARDUINO UNO (NANO) already with the code uploaded and test after each LED strips connected to make sure it will work!! it’s BETTER to invest time for NOT later having trouble and NOT knowing from where the fault comes 😉

.

.


.

Housing (case) for Xmas Star

Housing (case) for Xmas Star

Click image, please, to enlarge


Housing (case) for Xmas Star

Housing (case) for Xmas Star

Click image, please, to enlarge.


Housing (case) for Xmas Star

Housing (case) for Xmas Star


Housing (case) for Xmas Star

Housing (case) for Xmas Star

Click image, please, to enlarge.


Soldering inside the housing (case) for Xmas star

Soldering inside the housing (case) for Xmas star

Click image, please, to enlarge.

Soldering inside the housing (case) for Xmas star

Soldering inside the housing (case) for Xmas star

Click image, please, to enlarge.


Well, you have seen NOW the different mechanical steps and the soldering inside the housing, that’s the preparation, now we have to connect as well the Xmas star to the Arduino… We will use a 3 x 0.75 mm² cable to do so, find below, please, some PICs which show you the How-To, as well as the components with links to purchase them (I used AMAZON.DE), feel FREE to purchase them where you want:


Finished housing for Xmas star

Finished housing for Xmas star

Click image, please, to enlarge.


BTF-LIGHTING 1M 60 LEDs/Pixels/m WS2812B Schwarz PCB RGB adressierbare Strip 

WS2812B-1m-60 LEDs

Click image, please, to enlarge.

AMAZON.DE

https://www.amazon.de/gp/product/B01CDTEE5W


2 x 170mm x 105mm x 85mm Waterproof Plastic Enclosure Case Power Junction Box

2 x 170mm x 105mm x 85mm Waterproof Plastic Enclosure Case Power Junction Box

Click image, please, to enlarge.

AMAZON.DE

https://www.amazon.de/gp/product/B06XDK3GFT


Aussel 10 Stück AC 125 V 6A ON-ON 3 Pins 2 Position Mini Kippschalter für Arduino

Aussel 10 Stück AC 125 V 6A ON-ON 3 Pins 2 Position Mini Kippschalter für Arduino

Click image, please, to enlarge.

AMAZON.DE

https://www.amazon.de/gp/product/B077D9FRGL


Ehao 20 Stück Kupfer 5mm Leuchtdiode LED-Lampensockel-Montage-Panel-Display

Ehao 20 Stück Kupfer 5mm Leuchtdiode LED-Lampensockel-Montage-Panel-Display

Click image, please, to enlarge.

AMAZON.DE

https://www.amazon.de/gp/product/B01MRVAFGK/

10 Stück Wentronic EDC 21 L DC-Einbaubuchse Stift 2,1 mm,geschl.

10 Stück Wentronic EDC 21 L DC-Einbaubuchse Stift 2,1 mm,geschl.

Click image, please, to enlarge.

AMAZON.DE

https://www.amazon.de/gp/product/B00DDQ7EVG/

.


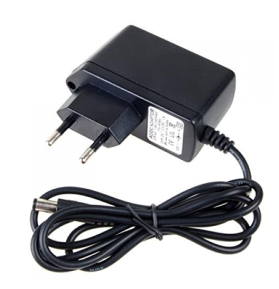
WINOMO DC 12V 1A CCTV Kamera Netzteil EU Stecker (Schwarz)

WINOMO DC 12V 1A CCTV Kamera Netzteil EU Stecker (Schwarz)


AZDelivery ⭐⭐⭐⭐⭐ UNO R3 mit USB-Kabel, 100% Arduino kompatibel mit gratis eBook!

AZDelivery ⭐⭐⭐⭐⭐ UNO R3 mit USB-Kabel, 100% Arduino kompatibel mit gratis eBook!

AMAZON.DE

https://www.amazon.de/gp/product/B01MDJA464/

Kopp 151610846 Schlauchleitung H03 VV-F, 3 x 0.75 mm², 10 m, weiß

Kopp 151610846 Schlauchleitung H03 VV-F, 3 x 0.75 mm², 10 m, weiß

AMAZON.DE

https://www.amazon.de/gp/product/B000VDEX2M/


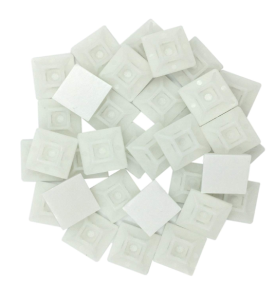
Klebesockel für Kabelbinder 19 mm x 19mm Montagesockel

Klebesockel für Kabelbinder 19 mm x 19mm Montagesockel


Click image, please, to enlarge.

AMAZON.DE

https://www.amazon.de/gp/product/B01NAKYL5X/


.

And here the MOST important to make it work, the code:

The code will get downloaded and copy it, then paste it into the Arduino IDE.

.

This is how the code will look and where you can (MUST) modify it, see PIC below please:

.

WS2812B Sketch

Click image, please, to enlarge.

.

You need ALSO to download and to install the “FastLED.h” Library

FastLED-Library

Click image, please, to enlarge it.

.

Download the  “FastLED.h” Library here in case of that you will NOT find it in the “Library manager”:

Check also, please:

Have fun and stay tuned for next projects 😉


..Here below the video of the same project done with a Xmas-Star…

.


GUST-AVRIL2014-800px-2L’auteur Gust MEES est Formateur andragogique / pédagogique TIC, membre du “Comité Conseil” de “Luxembourg Safer Internet” (LuSI), appelé maintenant BEESECURE, partenaire officiel (consultant) du Ministère de l’éducation au Luxembourg du projet  ”MySecureIT“, partenaire officiel du Ministère du Commerce au Luxembourg du projet ”CASES” (Cyberworld Awareness and Security Enhancement Structure). L’auteur était aussi gagnant d’un concours en électronique en 1979 ( Pays germaniques ) et voyait son projet publié dans le magazine électronique “ELO”.


The author Gust MEES is ICT Course Instructor, ”Member of the Advisory Board” from “Luxembourg Safer Internet” (LuSI), BEESECURE, Official Partner (Consultant) from the Ministry of Education in Luxembourg, project “MySecureIT“, Official Partner from the Ministry of Commerce in Luxembourg, project “CASES(Cyberworld Awareness and Security Enhancement Structure).

The author was also a winner of an electronics contest (Germanic countries) in 1979 and got his project published in the “Electronics Magazine ELO”.

..

Keywords necessary for me to create this blog post: Arduino UNO R3, Arduino NANO, UNO R3 Project, Xmas Star, WM2812B RGB LEDs, Heatshrinking-Tube, coding, learning to learn, learning by doing, easter, easter-egg

.

.

.

.


Tags: , , , , , , , , , , , , , , , , , ,

First Steps with the ESP8266 Wi-Fi Module | Maker, MakerED, Coding | Scrolling Text (Time, Temp., Humidity…) with 8×8 LED MATRIX

First Steps with the ESP8266 Wi-Fi Module | Maker, MakerED, Coding | Scrolling Text (Time, Temp., Humidity…) with 8×8 LED MATRIX

.

ESP8266 and Matrix LED MAX7219

.


First Steps with the ESP8266 Wi-Fi Module | Scrolling Text (Time, Temp., Humidity…) with 8×8 LED MATRIX 

In our previous blog post (Tutorial…), we were playing around with a LED MATRIX <===> First Steps with the Arduino-UNO R3 | Maker, MakerED, Coding | Scrolling Text with 8×8 LED MATRIX  <===> and we will continue to use the LED MATRIX, but this time with a Wi-Fi connection. We will use the module “ESP8266” which you can purchase worldwide around as it is very popular and it costs ONLY 7.49 €. I ordered mine on Amazon in Germany:

Good to know is the PINOUT of the ESP8266

.

ESP8266-NodeMCU

Click the image, please, to access the source.


Before we can use the module “ESP8266” and before the wiring we need to do some preparation:

.

Check the video below please who explains the first steps with the ESP8266:

.

.

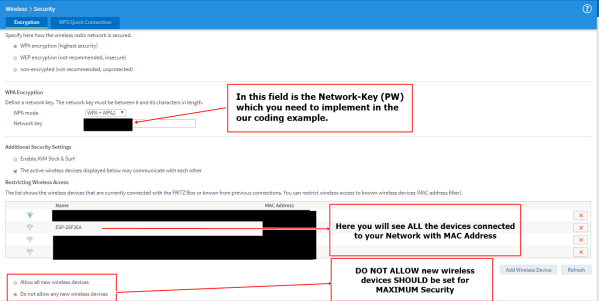
Now that we have configured the ESP8266 in the Arduino IDE we need some other information which are necessary to implement into the code. It is the name of the Wi-Fi Network (SSID) and the Password for the Wi-Fi Network.  AND a new device connecting to the router (the ESP8266) must GET allowed to do so, if your router is well configured for Cyber-Security! Thus meaning for Cyber-Security reasons: in the router security settings any device connecting to your Wi-Fi Network SHOULD NOT have access unless it is your own ones and unless you allow THEM to access!

.

My shown images from the Router are from a “FritzBox Router“, but it should be similar in other Routers!!

.

Router-1-corr

Click image, please, to enlarge.

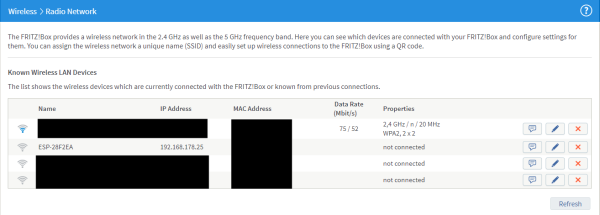
In the above image you see which devices are connected to your Network, to do so: open your router with your login and/or password and look under “Radio Network” (or similar). IF you don’t see your “ESP8266” in the Network while you run the code and it isn’t working does mean that your Network is well secured as it doesn’t allow any other device connecting to the Network!

Router-2-corr

Click above image, please, to enlarge.

.

You need then to give permission to the device to connect. To do so: Open the Security settings in your Router and click on “Allow all new wireless devices“. NOW, you will see that the “ESP8266” is part of the Network! Note down on a piece of paper its “MAC Address” and protect your Network again by clicking on “Do not allow new wireless devices“!!

.

Router-3

Click on the image, please, to enlarge.

.

NOW, click on the button “Add Wireless Device” as shown in above image.

.

Router-4

Click image, please, to enlarge.

.

A new window opens where you can add the new devices “MAC Address” which you wrote down before. Do so please and then click the button “OK“. Go back and have a look if the device is now in the authorized devices in your Network.

Required:

  • SSID
  • WLAN Password
  • Acces authorization for the Wi-Fi

The Code for the ESP8266 and first try

I used a video tutorial in German from Switzerland as well as its Code for this project as it is very well explained. Even if you don’t understand German, you can follow step by step in the video:

.

.

While watching the video on YouTube, you will find the download link for the code, check below please:

.

Video Tutorial-2

Click image, please, to enlarge.

.

You can find another interesting code here on the blog as well as the wiring diagram and a GREAT description (in German):

Unzip the code and install it by following the video instructions; check @ 8.30 minutes and follow step by step…

After everything is installed and the code is in the Arduino IDE you need to adapt the code to your needs: check video @ 10.36 minutes

  • Entering your Network name, the SSID
  • Entering the Network-Key; Check above Router images…

.

1ibdy1vf6wghd-n05dgl-attenzionearchitettofr01When you run the code for the first time: disconnect the two wires for the power supply (GND and VCC) as the LED Matrix will light all the dots and the power consumption will be by 1.5 Ampere; thus meaning the components, especially the chips will become hot, even could get overheated!! Once the Arduino IDE shows you that the code is uploaded reconnect them and it should work.

.

That’s it folks; now you can run the code and have fun! I takes a bit time before the code runs: first “Compiling Sketch…“, followed by “Uploading…” and “Done Uploading…” and the ESP8266 tries to connect with the Wi-Fi Network…

Connecting

.

If everything was made correctly as described above you should receive now your personal weather data… FIRST the time will GET displayed for a couple of seconds (that period could GET changed by your settings in the code…)…

.

Time

.

Then the scrolling text starts displaying the temperature, humidity, air pressure, rain risk in % and wind speed…

.

Scrolling text: temp., humidity...

.

Stay tuned for next blog posts and enjoy it 😉

Have FUN with your “LEARNing-By-Doing project” and try out ALSO the other examples 😉

.

Keywords necessary for me to create this blog post: Arduino, Wi-Fi, wireless, ESP8266, Weather received through Wi-Fi, LED Matrix, Coding, Maker, MakerED, MakerSpaces, Learning By Doing, Learning To Learn, PracTICE,

.


.

GUST-AVRIL2014-800px-2L’auteur Gust MEES est Formateur andragogique / pédagogique TIC, membre du “Comité Conseil” de “Luxembourg Safer Internet” (LuSI), appelé maintenant BEESECURE, partenaire officiel (consultant) du Ministère de l’éducation au Luxembourg du projet  ”MySecureIT“, partenaire officiel du Ministère du Commerce au Luxembourg du projet ”CASES” (Cyberworld Awareness and Security Enhancement Structure). L’auteur était aussi gagnant d’un concours en électronique en 1979 ( Pays germaniques ) et voyait son projet publié dans le magazine électronique “ELO”.


The author Gust MEES is ICT Course Instructor, ”Member of the Advisory Board” from “Luxembourg Safer Internet” (LuSI), BEESECURE, Official Partner (Consultant) from the Ministry of Education in Luxembourg, project “MySecureIT“, Official Partner from the Ministry of Commerce in Luxembourg, project “CASES” (Cyberworld Awareness and Security Enhancement Structure).

The author was also a winner of an electronics contest (Germanic countries) in 1979 and got his project published in the “Electronics Magazine ELO”.

.

Stay tuned for next blog post(s) 😉..
.

Keywords necessary for me to create this blog post: Arduino UNO R3, Arduino NANO, MAX7219 LRD DISPLAY, Coding, Maker, MakerED, MakerSpaces…


.

.

.


Tags: , , , , , , , , , , , , , , , , , , , , , , , , ,

First Steps with the Arduino-UNO R3 | Maker, MakerED, Coding | SMART V3.0 ROBOT CAR Kit

First Steps with the Arduino-UNO R3 | Maker, MakerED, Coding | SMART V3.0 ROBOT CAR Kit

.

ELEGOO SMART ROBOT CAR KIT V3.0

.


First impressions

Elegoo Smart Robot Car Kit for Arduino.

.

The Kit is delivered in a well organized plastic box with a poster inside of all the parts with description and a CD with the PDF Manual, Code and Libraries.

The manual in PDF format is actually very well documented an nobody should have problems to follow the instructions.

There are even the necessary tools for assembling provided, such as different screwdrivers.

.


.


Assembling and cabling

Assembling part 1.

.

.

.

First steps, assembling… Actually it isn’t that difficult, only problem encountered are 2mm screws and nuts, I will continue tomorrow with a magnifying glass and more light to handle it (OH my eyes…). There was some fight with screws and nuts ranging from 1.6mm (Ultrasonic Sensor) to 2mm (Servo fixing) where I needed to use special tools, was a bit stressing to work with such tiny things.

.

.

.

.

.

ToolsFor solving the problems encountered with the tiny screws and nuts, I used a “magnetic telescope” for the 1.6 mm nuts and a “spring-loaded tongs” for the 3 mm nuts.

The cabling was very easy and the rest of the assembling as well as it is VERY well described in the Assembling document (in PDF). Next step is to control (End-Control) again the cabling to make sure that everything is correctly connected and THEN the Coding

The documentation is available in different languages…

.

.

.

.


Charger with US plugWhen living in Europe, make sure to make your order on the national platform from Amazon, I made my order in the US and I got the charger delivered with an US plug! Amazon Germany delivers it with an “Euro Plug”! <===>

I made the End Control, checking if the connections were made right, it was.


.

Assembling part 2

.

Assembling the two black plates and the wheels was easy peasy as well…

.

ELEGOO SMART ROBOT CAR KIT V3.0

.


The Coding

Manual on CD

Click the image, please, to enlarge.

Opening the Manual NOW to proceed for the first lesson “Make the car move on [Auto-GO]”. Very easy to follow, it worked in less than 5 minutes. Unplugging the USB cable from the laptop, will it work!?

Taking the car away from the desk and putting it on the floor, switching the Power-supply on and it runs around by avoiding any obstacles while they are detected by the “Ultrasonic Sensor”, it’s FUN watching <===> Success Trying out NEXT lesson now…

The courses are made very easy: plug the USB cable to the computer, open the course in the Arduino IDE, upload it into the IDE, save it in your folder, unplug the USB cable, take the car away from the desk and put it on the floor, switch it on and enjoying…

Well, that’s a Kit which everybody can try and have success, give it a try and enjoy “Coding”, “Maker” activities…


.

GUST-AVRIL2014-800px-2L’auteur Gust MEES est Formateur andragogique / pédagogique TIC, membre du “Comité Conseil” de “Luxembourg Safer Internet” (LuSI), appelé maintenant BEESECURE, partenaire officiel (consultant) du Ministère de l’éducation au Luxembourg du projet  ”MySecureIT“, partenaire officiel du Ministère du Commerce au Luxembourg du projet ”CASES” (Cyberworld Awareness and Security Enhancement Structure). L’auteur était aussi gagnant d’un concours en électronique en 1979 ( Pays germaniques ) et voyait son projet publié dans le magazine électronique “ELO”.


The author Gust MEES is ICT Course Instructor, ”Member of the Advisory Board” from “Luxembourg Safer Internet” (LuSI), BEESECURE, Official Partner (Consultant) from the Ministry of Education in Luxembourg, project “MySecureIT“, Official Partner from the Ministry of Commerce in Luxembourg, project “CASES” (Cyberworld Awareness and Security Enhancement Structure).

The author was also a winner of an electronics contest (Germanic countries) in 1979 and got his project published in the “Electronics Magazine ELO”.

.

Stay tuned for next blog post(s) 😉..
.

.

Keywords necessary for me to create this blog post: Arduino UNO R3, coding, learning to learn, learning by doing, trouble shooting, sensors, assembling, Robot Car Kit,

.


.

.


Tags: , , , , , , , , , , , , , , , , , , , , , ,

NEW Words, Trends to Know and to LEARN about in 21st Century

NEW Words, Trends to Know and to LEARN about in 21st Century

.

Evolution of Education: Wordle Logo

.


NEW Words, Trends to Know and to LEARN about in 21st Century

programmerman-animatedAre YOU feeling overwhelmed with strange words, NEW trends, when you are reading and following posts, tweets, articles about/and in Social Media!? Well, I can understand YOU!!! There are SO MUCH, if I wouldn’t do curation, I wouldn’t understand it anymore as well, to be honest! 😉 Through my daily curation I see it and I read those articles, from WHERE I learn a lot as an autodidact. WHEN there are some words which I DON’T understand I am going MOSTLY to Wikipedia to find its explication and if NOT sufficient, I use GOOGLE and other online resources to know MORE about it!

For ME it’s THE BEST way (Curation) to learn and to stay up-to-date with my Professional Development! I tried out a lot of different ways after being online since 1998 and believe me, please, it’s the fastes way to keep it UP! 😉 Through Curation I build up my <===> PKM <===> Personal [Professional] Knowledge Management from where I can use it in ANY of my blogs, twitter posts and other Social Media to share it to people willing to learn.

Let us FIRST have a look about WHAT Curation and PKM is (first stuff to read and bring into PracTICE) before WE continue with THE strange words and trends later:

SO, let’s have a look on some (actually a lot…) NEW words and trends in EDUcation and WHO will influence EDUcation below, as THEY are actually running in Real-World, let us START first with the words:

Check also, please:

P.S.: The present words with NOT YET a link will get updated later, otherwise I wouldn’t finish this blog post! 😉

Dynamic Learning

Does your classroom offer one-and-done types of learning activities, or does the learning grow, inspire, and evolve throughout the year and beyond? With digital tools like G Suite for Education that are available 24/7, the learning doesn’t have to stop when the bell rings at the end of class, or when the worksheet is turned in, or even when the school year ends. The learning takes on a life of its own; it becomes dynamicThis concept alone should change the way you think about learning in general and change the way you facilitate learning in the classroom.

Through Curation, Social Media twitter and by building a PLN this is perfectly possible!

BTW : Did YOU actually realize that NOW it’s the PracTICE WHICH is dominating the Real-World before it EVEN is taught by EDUcation, a BIG CHANGE, isn’t it!!! Because of Entrepreneurship (bold actions…) the internet helped to CHANGE the world and flipped EDUcation to bring it MORE close to the needs of the workforce/Industry!!!

The NEW Pedagogy is MORE about the learners, students and to put THEM into the drivers seat; looking to find a Win-Win situation about THE How-To to GET THEM learning together in a team (EVEN outside the School-Cocoon with Social Media…) and to prepare THEM for the workforce/labor/industry by being able for <===> Learning-To-Learn <===> for a Life-Long Learning once out of school!

.

Learn more:

For Modern EDUcation, please keep in mind the below:

.

Synthesizing Mind-5 Minds for the future

.

And for the “Learning-To-Learn“, please check my blog posts below:


.

GUST-AVRIL2014-800px-2.

L’auteur Gust MEES est Formateur andragogique / pédagogique TIC, membre du “Comité Conseil” de “Luxembourg Safer Internet” (LuSI), appelé maintenant BEESECURE, partenaire officiel (consultant) du Ministère de l’éducation au Luxembourg du projet  ”MySecureIT“, partenaire officiel du Ministère du Commerce au Luxembourg du projet ”CASES” (Cyberworld Awareness and Security Enhancement Structure).

.


The author Gust MEES is ICT Course Instructor, ”Member of the Advisory Board” from “Luxembourg Safer Internet” (LuSI), BEESECURE, Official Partner (Consultant) from the Ministry of Education in Luxembourg, project “MySecureIT“, Official Partner from the Ministry of Commerce in Luxembourg, project “CASES” (Cyberworld Awareness and Security Enhancement Structure).


...

Stay tuned for next blog post(s) 😉

.

Keywords necessary for me to create this blog post: Pitch, pitching, Blockchain, Fintech, Trusted Certificates, Bitcoin, Ethereum, Crypto Currency, CyberSecurity, Proactive Thinking, Critical Thinking, Digital CitiZENship, Apps, Privacy, Fake News, Growth Mindset, Curation, PLN, PKM, using Creativity in EDUcation,…

.

.

.

.

 
1 Comment

Posted by on August 28, 2017 in 21st Century Skills, 21st-Century-Teaching-and-Learning, Adaptive Learning, Adult Learning, Analyzing, Andragogy, Artificial Intelligence, Augmented Reality, Autodidact, Awareness, BEE CREATIVE, Better Learning, Better Learning about ICT, Better Teaching, Big Data, Bitcoin, Blockchain, Blog creation, Blogs, Bring Your Own Device, Bring Your Own Device (BYOD), BYOD, Coaching, Coding, Collaboration, Collaborative Learning, Collective Intelligence, Competency, Concept, Connected Educators, Creating Mind, Creativity, Critical Thinking, Critical Thinking-a need!, Criticism, Curation, cybersecurity, Design Learning, Differentiated Instruction, Digital CitizenShip, Digital Footprint, Digital Intelligence, DQ, Education, Education 4.0, eLeadership, eLearning, Emotional Intelligence, Engagement, Entrepreneurship, EQ, eSkills, Ethical Mind, ethics, Europe, Facebook, FAQ, Feedback, Flipped Classroom, Flipped Learning, Free courses, Future Work Skills, Gamification, Gaming, Global Collaboration, growth mindset, Holistic view of EDUcation in the future, HowTo, Innovation, Internet Of Things, IoT, itsecurity, Key Instructors, Leadership, Learning about Social Medias, Learning about Twitter, Learning basics of Cyber-Security-Practice, Learning By Doing, Learning to Learn, Luxembourg, maker, Maker PracTICE, MakerED, MakerSpace, MakerSpaces, Mixed Reality, Mobile Security, Modern EDU, Not ONLY rights but also responsibilities, Open Mind, Personal Learning Network (PLN), Personalized Learning, PKM, PLN, PracTICE, Privacy, Proactive Thinking, Professional Development, Professional EDUcators TEACHers, Project Based Learning, QR, QR-Code, Quality Courses, RA, Reality, Reflecting, Respectful Mind, Responsibility, Right use of Technology, Rise Of The Professional Educator, Self-directed Learning, Sir Ken ROBINSON, Skills, Social Media, Student Centred, Students 21st Century Survival Guide, Sustainability, Synthesizing Mind, Teacherpreneurs, Team-Teaching, Technology Integration, Twitter, Understanding the internet, Virtual Reality, VR, Wearables


Tags: , , , , , , , , , , , , , , , , , , , , , , , , , , , , , , , , , , , , , , , , , , , , , , , , , , , , , , , , , , , ,

Maker-First Steps in Electronics-Light guided rotating and moving plastic container

Maker-First Steps in Electronics-Light guided rotating and moving plastic container

.

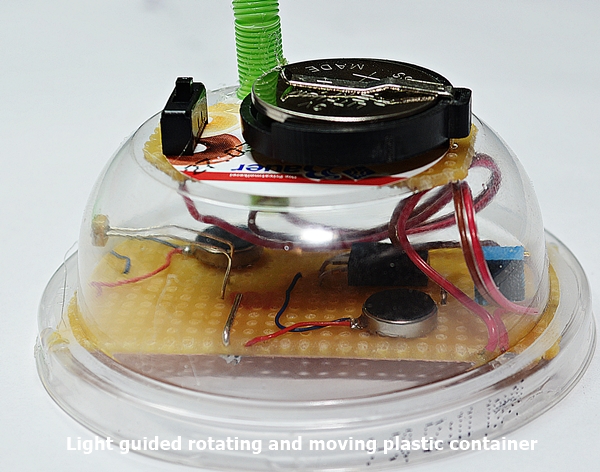
Light guided rotating and moving plastic container

.


Light guided rotating and moving plastic container

In previous Maker tutorials WE were using LEDs and vibration motors, WE will continue with it and adding some NEW components: a transistor and a LDR (Light-Dependent Resistor). WE will use ALSO AGAIN a plastic container, this time a transparent one so that persons could see WHAT’S inside (for the curious ones) 😉 This will ALSO push the makers WHO are building this project to work neatly as everyone could see the quality of THEIR work!!

Thus said, let me tell YOU that I first tried to fix the battery holder and the switch with instant glue; it didn’t work well!!

Example with instant glue to fix the battery holder and the switch: BAD solution as the glue reacts with the plastic and makes a BAD looking, NOR are they real well fixed on the plastic!!

.


BETTER solution is to fix (solder) the battery holder and the switch on a small part of stripboard and to make the connection to the main stripboard (where all the components are) through a flat cable. Therefore we need to drill some holes with a 1 mm drill exactly there where the pins of the switch and the battery holder are. Now measure the length of the stripboard and once the holes are drilled, place the switch and the battery holder and solder them on the stripboard.

.

.


NEW components are used in this project as a transistor, an LDR and a trimmer (adjustable resistor)

WE are using a transistor is this project; a transistor is a semiconductor who basically works as a switch or an amplifier. WE will NOT GO to much into theory, YOU can discover more in the “Learn more section below”.

START Text from http://www.build-electronic-circuits.com/ldr-circuit-diagram/

LDR.
.
Light dependent resistor or photoresistor is a device whose resistance is dependent on the strength of the light as they are composed of high resistance semiconductor material. When light hits the device, the photons give electrons energy. Higher the power of light, lower the strength of resistance. This particular action makes the electron jump into the conductive band and thus conduct electricity. Taking a cue from this concept, Øyvind Nydal Dahl, in this tutorial, has dealt in a circuit for LDR or Light Dependent Resistor to make a light detector.
 .
The above LDR Circuit Diagram works on the amount of light penetration. Hence, when it is completely dark, the LDR occupies high resistance. As a result, the voltage at the base of the transistor becomes too low to turn the transistor ON. At this stage, the current doesn’t flow from the collector to the emitter of the transistor, instead, it passes through the LDR and the potentiometer.
When the light is provided at comparatively low density, the LDR has low resistance. But it is sufficient enough to bring the voltage at the base of the transistor higher and also to turn the transistor ON. Once the transistor is turned on, current starts flowing through it from the positive battery terminal to the negative battery terminal covering R1 and the LED (IN OUR CASE, through the vibration motor). With this, the LED, lights up (IN OUR CASE, the motors go on vibration). [END Text from http://www.build-electronic-circuits.com/ldr-circuit-diagram/]
WE use the same schema as in above tutorial, BUT WE replace the LED by two (2) vibration motors. Check the schematics below, please.

.

Learn more:

.


The schematics of our project

Here below the schematics where YOU will see how the components are represented; ONLY eight (8) parts. The two vibration motors are in parallel.

.

LDR and vibration motors-schematics-screenshot

.

BD137

Check this layout please to find out how to connect the transistor.

.

Learn more:

.


The components

Please find below the components:

.

Parts List

.

For the details, please check below.

.


Detailed parts list, supplier and prices

Please find below the detailed parts list as well as the supplier and the prices.

.

Item and quantity

Supplier and order number

Price

A bit flat cable, silver wire and 1 x drinking straw CONRAD: 604069-62 0,50€
 1 x LDR (Light Depending Resistor)  CONRAD: 140374-62 2,59€ 
 A bit heat shrinking tube 0,50€ 
1 x Switch ADAFRUIT: ID 805 0,95€
1 x Battery CR2430 CONRAD: 612987-62 3,99€

2 x Vibrating Motors from Adafruit

 ADAFRUIT: ID 1201 à 1,95€

3,90 
1 x 5mm flashing LEDs from Adafruit pack of 10 is $4.95 ADAFRUIT: ID 680 0,50 €
 1 x Battery holder  CONRAD: 65058-62 1,15€
 1x Trimmer (variable resistor) 100k  CONRAD: 423858-62  2,69€
1 x Transistor BD137-16  CONRAD: 151036-62 0,23€ 
  Total: 17€ 

.

As you can see it is a very cheap project, ONLY 17 € and easy to realize! ALL what YOU need is a bit time, passion and here we GO! 😉 Have FUN!

Online ordering links:

.

transparent plastic container

.

transparent plastic container

.

I used the upper cup of a yogurt (0,89€) which is transparent and BTW is delicious 😉.


The tools needed

Check below please WHAT the tools are that you will need for this project. The small saw is needed to cut the stripboard.

.

tools-list-electronic-arts

.

WE need also a mini drill to drill the wholes for the switch, the battery holder and the whole for adjusting the variable trimmer resistor.

.

PROXXON Mini Drill

.


Details of the LED in the drinking straw

WE are using a multi color LED from ADAFRUIT (ID 680), a Diffused 5mm Fast Flashing RGB LED, which works with a voltage of 3 Volts; so we don’t need any resistor in series. To make a neatly connection we will use a flat cable and to avoid a shortcut we will fix our soldering with heat shrinking tube. Please follow the steps below.

.

LED soldering and heat shrinking tube

.

LED soldering and heat shrinking tube

.

Passing the LED through the drinking straw

.

The LED will get soldered on the Plus and Minus of the second stripboard; it will flash permanently as far as the switch is on “ON position”.

.

led-symbols

.

Learn more:

.

.

led-symbols-anode-and-cathode.

.

Practical Tip: LEDs are transparent, so the Cathode (Minus) looks always a bit larger as the Anode (Plus).

.

.


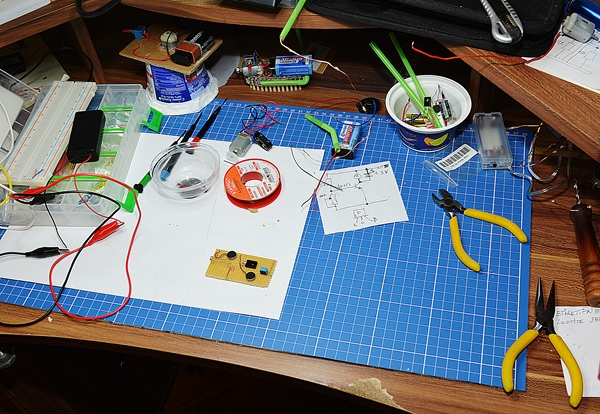
The MAIN stripboard with the components

Below YOU can see the work in progress.

.

NEW projects-11-03-2017

.

Light guided rotating and moving plastic container

.

Light guided rotating and moving plastic container

.

In above photo you can see the soldering on the stripboard as well as the fixing with hot glue on the bottom.

.


Some adjustments are needed

Do YOU remember that WE drilled a hole just in the height of the axis of the trimmer (adjustable resistor)? Check photo below, please.

.

Hole to adjust the trimmer

.

For this WE will need a 1 mm screwdriver and a torch. I used a mini LED torch from CONRAD (Item no.: 868885-62 for 6,99€).

.

LDR (Light-Dependent Resistor)

.

How-To make the adjustments: put the light source in front of the LDR and trim with the 1 mm screwdriver until the motors are vibrating, if the motors are already vibrating trim back (turn the reverse direction…). This might take some time until you got it to the right point; the motors should only vibrate WHEN the light source is on!!


.


The video of our project

.

.

Check out this video, which explains very well how it works.

.

.


.

GUST-AVRIL2014-800px-2L’auteur Gust MEES est Formateur andragogique / pédagogique TIC, membre du “Comité Conseil” de “Luxembourg Safer Internet” (LuSI), appelé maintenant BEESECURE, partenaire officiel (consultant) du Ministère de l’éducation au Luxembourg du projet  ”MySecureIT“, partenaire officiel du Ministère du Commerce au Luxembourg du projet ”CASES” (Cyberworld Awareness and Security Enhancement Structure). L’auteur était aussi gagnant d’un concours en électronique en 1979 ( Pays germaniques ) et voyait son projet publié dans le magazine électronique “ELO”.


The author Gust MEES is ICT Course Instructor, ”Member of the Advisory Board” from “Luxembourg Safer Internet” (LuSI), BEESECURE, Official Partner (Consultant) from the Ministry of Education in Luxembourg, project “MySecureIT“, Official Partner from the Ministry of Commerce in Luxembourg, project “CASES” (Cyberworld Awareness and Security Enhancement Structure).

The author was also a winner of an electronics contest (Germanic countries) in 1979 and got his project published in the “Electronics Magazine ELO”).

.

Stay tuned for next blog post(s) 😉

..

.

Keywords necessary for me to create this blog post: LDR, Light Depending resistor, resistors, vibrating motors, LEDs, transparent plastic container (yogurt), strip board, flat cable, drinking straw, drilling, adjustable resistor, trimmer, transistor, drilling, hot glue,

.

.


Tags: , , , , , , , , , , , , , , , , , , , , ,

Maker-First Steps in Electronics-Moving and rotating statue

Maker-First Steps in Electronics-Moving and rotating statue

.

the-moving-and-rotating-electronics-statue


.


Maker-First Steps in Electronics-Moving and rotating statue

In OUR previous electronics projects WE were tinkering around with vibration motors and flashing LEDs, well we will continue on the same schema to get a bit more soldering practice and to discover ALSO the use of heat shrink tube. This is ALSO a soldering exercise with some fun, and knowledge acquirement as usually in my tutorials. WE will learn also about Lithium batteries and their power by connecting them in parallel.


OHM’s Law, resistors and LEDs

.

led-symbols

.

.

Learn more:

.


.

led-symbols-anode-and-cathode.

.

Practical Tip: LEDs are transparent, so the Cathode (Minus) looks always a bit larger as the Anode (Plus).

.

.

.

When working with electronics WE need to learn a bit theory and mathematics, BUT DON’T worry, it is very easy! First of all which is mandatory, is the “OHM’s Law“. YOU DON’T need to calculate! 😉 There is an online calculator who will do the job for YOU! Click the image below please to access the online calculator and play a bit around with it to get used to it, have fun.

..

ohms-law-calculator

Click the image please to access the online calculator

.

Useful online help:

.


The schematics of our project

Here below the schematics where YOU will see how the components are represented; YOU will remark that we have three (3) times a parallel circuit. Two batteries in parallel, two flashing LEDs in parallel and two vibration motors in parallel.The resistors are NOT shown in the schematic as THEY are NOT connected, they are just used as stabilization of the statue!

.

moving-and-rotating-electronics-statue-schematics-screenshot

.

WHY connecting batteries in parallel!? Check below, please:

To find it out I recommend to make a bit PracTICE:

  1. Try first to use ONLY 1 battery CR2032 and let run the statue.
  2. NOW use two (2) batteries CR2032 and let run the statue.
  3. Use NOW ONLY one (1) battery CR2430 (they are bigger in diameter and on power) and let run the statue.
  4. NOW use two (2) batteries CR2430 and let run the statue.

Both batteries deliver 3 Volts, BUT there is a difference in the possible current they can deliver. The CR2032 delivers 225 mAh and the CR2430 delivers 280 mAh!

Through THIS “Learning-By-Doing” YOU will easily understand it!

.


Detailed parts list, supplier and prices

Please find below the detailed parts list as well as the supplier and the prices.

.

Item and quantity

Supplier and order number

Price

1 x Stripboard CONRAD: 529531 2,19€
Silver wire 1 mm / 14 m <===> +/- 30 cm needed CONRAD: 607657  0,40€
1 x Switch Adafruit: ID 805 0,95€
2 x Button cell holder à 1,29€ CONRAD: 650546  2,58€

2 x Vibration motor from Adafruit

 Adafruit: ID 1201

 1,95€
2 x 5mm flashing LEDs from Adafruit pack of 10 is $4.95 Adafruit: ID 680 1 €
2 x Cell CR2032 à 4,19€ CONRAD: 651088  8,358€

2 x Cell CR2430 à 3,99€

CONRAD: 612987 7,98€ 
 Total: 25,43€ 

.

As you can see it is a very cheap project, ONLY 25,43€ and easy to realize! ALL what YOU need is a bit time, passion and here we GO! 😉 Have FUN!

Online ordering links:


The tools needed

Check below please WHAT the tools are that you will need for this project. The small saw is needed to cut out a small piece of 55 x 45 mm from the stripboard.

.


tools-list-electronic-arts

Click image please to enlarge.

.


Working with heat shrink tube

[START text from Wikipedia] Heat shrink tubing (or, commonly, heat shrink or heatshrink) is a shrinkable plastic tube used to insulate wires, providing abrasion resistance and environmental protection for stranded and solid wire conductors, connections, joints and terminals in electrical work. It can also be used to repair the insulation on wires or to bundle them together, to protect wires or small parts from minor abrasion, and to create cable entry seals, offering environmental sealing protection. Heat shrink tubing is ordinarily made of nylon or polyolefin, which shrinks radially (but not longitudinally) when heated, to between one-half and one-sixth of its diameter. [END text from Wikipedia]

Learn more:

Watch the video below please to see the How-To to work with heat shrink tube.

.

.


The video of our project

Please check the video below to see our project on action.

.

.


Very important

In OUR above project we are using two (2) 3 mm red LEDs in parallel. It DOESN’T work when YOU take two different colors, I tried it out 😉 WHY!??? Please check links below:


Keywords necessary for me to create this blog post: Power resistors, flashing LEDs, switch, CR2032, CR2430, Lithium Batteries, stripboard, heat shrinking tube,

.


GUST-AVRIL2014-800px-2L’auteur Gust MEES est Formateur andragogique / pédagogique TIC, membre du “Comité Conseil” de “Luxembourg Safer Internet” (LuSI), appelé maintenant BEESECURE, partenaire officiel (consultant) du Ministère de l’éducation au Luxembourg du projet  ”MySecureIT“, partenaire officiel du Ministère du Commerce au Luxembourg du projet ”CASES” (Cyberworld Awareness and Security Enhancement Structure). L’auteur était aussi gagnant d’un concours en électronique en 1979 ( Pays germaniques ) et voyait son projet publié dans le magazine électronique “ELO”.


The author Gust MEES is ICT Course Instructor, ”Member of the Advisory Board” from “Luxembourg Safer Internet” (LuSI), BEESECURE, Official Partner (Consultant) from the Ministry of Education in Luxembourg, project “MySecureIT“, Official Partner from the Ministry of Commerce in Luxembourg, project “CASES” (Cyberworld Awareness and Security Enhancement Structure).

The author was also a winner of an electronics contest (Germanic countries) in 1979 and got his project published in the “Electronics Magazine ELO”).

.

Stay tuned for next blog post(s) 😉

.


.

.


Tags: , , , , , , , , , , , , , , , , , , , , , , , , , ,

Electronics Starter Kit for Makers

Electronics Starter Kit for Makers

.

maker-wordle-logo-2

.


Electronics Starter Kit for Makers: What is the minimum equipment?

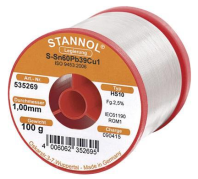
What is the minimum equipment and what are the costs? That’s certainly the first question you will ask. Let us have a look: in electronics we need to solder the components, a solder iron is required with its accessories. Please check below to find out in detail.

.

Soldering station

.

 lotstation

Soldering iron kit

.

soldering-iron-kit14,99 €
CONRAD: 588332-62

Solder Wire

 lotzinn-1mm

9,99 €

CONRAD: 812811-62

Desoldering pump

.

entlotpumpe

7,99 €

CONRAD:  588257-62

Stripboard

 .
 .
.
platine-hartpapier
 2,19 €
CONRAD: 529531-62

Selfmade Stripboard Cutter

.

.

.

Selfmade stripboard cutter

Click image please to enlarge

Helping hand with magnifying glass
 dritte-hand
8,99 € 
CONRAD: 588221-62

Wire bender for components

.

.

 abbiegevorrichtung
3,29 € 

CONRAD: 425869 – 62

Electronics pliers set

.

.

electronics-pliers-set

19,99 €

CONRAD: 822910 – 62 

.
Concerning the soldering iron, you have two choices: buying a normal 30 Watt soldering iron as a kit or a soldering station which is about 170 €. Up to your budget what you will buy.
Concerning the stripboard: this is ideal for prototyping of new projects.

Learn more:


vitrometer-widerstands-uhr

CONRAD order number: 400009 – 62

.

.

Resistors have a color-code; you may buy as well for 1,99 € a help to learn to find the value of the resistors as long as you don’t know by heart the how to to know.

.

.

.

.

resistor-color-chart.

.

Useful online help:


.


WHERE can I get the equipment?

As we know now what is the equipment required we need also to find out from where we can get it. Well, we can find out if there is a local electronics store and/or buying it online.

Find below, please, addresses of online electronics stores:

.


WHAT should I know about soldering?

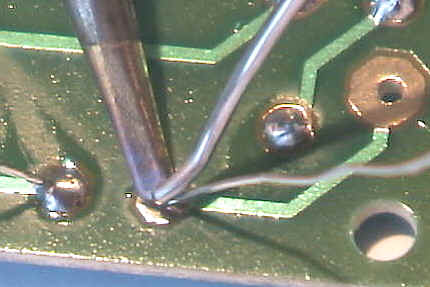
Soldering is no magic, there are only some rules to follow to get a perfect soldering which are not difficult at all. You can find a great guide below, please read it.

.

loetdraht-zufueren

Please click the image to access the article.

.

Learn more:


How and with what should I start?

I would advice you to start with electronic kits as they are delivered with a guide who provides easy to follow steps. Please find below some good addresses from where you can buy them:

.

As a newbie you should buy you some books to learn the PracTICE; I recommend you to read these books (I learnt from them also…):

.


What else should I care about?

1ibdy1vf6wghd-n05dgl-attenzionearchitettofr01Protect YOUR health: Hazardous solder fumes are harmful to your health!! SO, make sure to NOT put your nose over the soldering and to breath, please! NOR to have drinks on the working place and to drink during the soldering where the soldering takes place!! Be VERY carefully ALSO about on How-To handle the soldering iron; it heats up to 150°C-450°C (30 Watt / 80 Watt)!! NEVER touch the soldering iron underneath the insulating part (on the metal) as it may be ignited and you may have severe burns!!!

.


DOS and DON'TS SOLDERING

.

gears icon 

With WHATEVER tools YOU work, keep THIS in mind, please <===> Safety first!!!

I am trying to give You the THINKing behind a project (Which EVER one…) LEARNing-By-Doing, should GET done with Students, LEARNers THAT way; let THEM try out till THEY find the appropriate solution. Let THEM create a blog post about it where THEY can report about THEIR adventures and HOW THEY solved the problem for BEST… Of course with photos and with the written experience; #CriticalTHINKing and #ProactiveTHINKing will emerge 😉 As well as #PracTICE of course…

As a Coach You observe and guide THEM with “Couldn’t THERE be ANOTHER way to realize it?”; Make THEM curios about to challenge THEMSELVES for BETTER 😉 
Have FUN!
Look at following keywords to find out about what you should think about and what this sort of creation will result in.
.
Keywords: creativity, motivation, self-learning,  autodidact, critical thinking, proactive thinking (learning from fails for the future…), engaging, competences, PracTICE skills, learning-By-Doing, learning to learn, problem solving , organization skills, team work, coaching, fun, gift from kids to parents for Xmas, feeling proud about having created something itself, self-esteem…
.

.

Learn more:


.

GUST-AVRIL2014-800px-2L’auteur Gust MEES est Formateur andragogique / pédagogique TIC, membre du “Comité Conseil” de “Luxembourg Safer Internet” (LuSI), appelé maintenant BEESECURE, partenaire officiel (consultant) du Ministère de l’éducation au Luxembourg du projet  ”MySecureIT“, partenaire officiel du Ministère du Commerce au Luxembourg du projet ”CASES” (Cyberworld Awareness and Security Enhancement Structure).


The author Gust MEES is ICT Course Instructor, ”Member of the Advisory Board” from “Luxembourg Safer Internet” (LuSI), BEESECURE, Official Partner (Consultant) from the Ministry of Education in Luxembourg, project “MySecureIT“, Official Partner from the Ministry of Commerce in Luxembourg, project “CASES” (Cyberworld Awareness and Security Enhancement Structure).

.

Stay tuned for next blog post(s) 😉

.


Tags: , , , , , , , , , , , , , , , , , , ,

Ideas for Maker Spaces and MakerED-Electronics-1-Xmas Tree

Ideas for Maker Spaces and MakerED-Electronics-1-Xmas Tree

.

maker-wordle-logo-2


.


Do YOU want to introduce Maker-ED in YOUR classroom?

whats-in-a-makerspace

Click image please to enlarge.

There is a BIG trend in Education worldwide; THE <===> Maker-Movement <===> and everybody is asking themselves on the How-To to follow and WHAT to do with the kids and at which age to start! Well, actually it isn’t that difficult as most think 😉 YOU can START it even in the classroom without having a “MakerSpace“, for the beginning! START with easy and low budget stuff; Xmas is close (I write this blog post on 22-11-2016), so WE will create a Xmas project as low as for +/- 5-6 € (6 US $).

A bit theory before WE start with the PracTICE 😉 If YOU don’t want to read it and GO straight on for the PracTICE, check below!

BUT, let us first start to learn more about “Maker“, “Maker-ED” and “Makerspaces“, please check my blog posts below:

ALL about that BIG trend is actually about <===> Creativity <===> and through tinkering <===> Learning-By-Doing <===> the kids, adults and seniors will find and develop THEIR creativity! And YOU <===> EDUcators, TEACHers <===> will guide THEM as a coach through the learning process 😉 YOU will learn YOURSELVES also from the sparkling creativity of your learners and together as a team YOU will GROW! Creativity is NO magic, it just needs to GET started!

Learn more:

.

As I treat myself as I would treat my students, learners by doing (creating) a project, WE will discuss my different tries as well <===> Learning-By-Doing <===> mixed together with <===> Critical-Thinking and Proactive-Thinking <===> Sounds strange, isn’t it? 😉

Learn more:


THE planning

First comes the idea and the Deep-Thinking about it… THEN as the idea concept is made (in the brain and/or on cold print), WE need to find a store from where we can get the stuff. Make you a list of your local “Tinkering stores” and “Electronic Stores” and visit them also to find out WHAT they have in stock, take some catalogs (if present…) and probably YOU will get NEW ideas for next projects as well… DON’T forget to plan your journey for your purchasing; especially when the stores are in the city (searching for a parking, heavy traffic, etc.). FYI: I needed 40 minutes in the morning at 11:00 h to find a parking place!

SO, for my country Luxembourg, here below the addresses:

bastelkiste-3d-xmas-tree.

.

.

Wooden 3D Xmas Tree (see PIC to get other ideas as well…)

Price as on 22-11-2016: 1,49 € (Set of two trees)

.

.

.

.


Copper Wire LEDs 10 pieces.

.

.

.Copper Wire LEDs (NOT flashing)

  • Bâtiself

Price as on 22-11-2016: 2,79 €

.


..

.

For Germany (Deutschland):

You could find similar products here:


THE PracTICE, let’s start

Wooden 3D Xmas Tree

..

.

.

First unpack all the bought stuff and check for the How-To to assemble it. As you can see in left-hand side image the trees (there are two in the package) are made from thin wood and are NOT painted. WE have now two different possibilities: spraying the trees with a green spray (must be done outdoor or close to an open place to outdoor because of toxic gases! Some persons could also be allergic to the gazes…) or let the kids, students, learners paint them by themselves.

.

.

.

Please check below the different steps. Click on the images to enlarge them…

.

Unpacked and assembled; under a minute.

Wooden 3D Xmas Tree assembled

2. Wiring the Xmas Tree with the Copper Wire LEDS

Wooden 3D Xmas Tree with leds

3. Green Spray (what I had still in my stock)

dsc_0428

4. Painted (with spray) Xmas Tree parts

Painted (with spray) 3D Wooden Xmas Tree 

5. Assembling the 3D Xmas Tree

Painted (with spray) 3D Wooden Xmas Tree

6. 3D Xmas Tree assembled

Painted (with spray) 3D Wooden Xmas Tree

7. Wired (from the top to the bottom) 3D Xmas Tree
3D Wooden Xmas Tree with LEDS

8. Wired (from the bottom to the top) 3D Xmas Tree

3D Wooden Xmas Tree with LEDS

9. Other ideas…

bastelkiste-3d-xmas-tree

.
 .

Once the Xmas tree assembled take the “Copper Wire LEDS (10 LEDS)” and wire them around the 3D Xmas Tree and switch it on to see the result. please check photos 7 and 8.

I tried out two different ways: wiring the “Copper Wire LEDS” from the top to the bottom (8 LEDS were visible) and from the bottom up to the top (6 LEDS were visible. Check the above images (7 and 8), please, to see the results. THIS way of tinkering around doesn’t need any tools and could get used in any classroom up from early age under coaching of  Educators, Teachers.

You might also want to glue the wires to the Xmas Tree, possible also… Other possibilities are to drill in holes in the tree and to pass the wire through it. Experiment a bit with it and try to find different solutions, for that cheap price! <===> Color of Xmas Tree: with spray and/or painting by students, learners, kids <===> creativity <===> LET it GO, LET it FLOW!

Try out different ways and let me know by sending me photos in with your creations which I will add then to my blog post with referencing YOU!

For more ideas about Xmas projects, check below please:

.

gears icon 

I am trying to give You the THINKing behind a project (Which EVER one…) LEARNing-By-Doing, should GET done with Students, LEARNers THAT way; let THEM try out till THEY find the appropriate solution. Let THEM create a blog post about it where THEY can report about THEIR adventures and HOW THEY solved the problem for BEST… Of course with photos and with the written experience; #CriticalTHINKing and #ProactiveTHINKing will emerge 😉 As well as #PracTICE of course…

As a Coach You observe and guide THEM with “Couldn’t THERE be ANOTHER way to realize it?”; Make THEM curios about to challenge THEMSELVES for BETTER 😉 
Have FUN!
Look at following keywords to find out about what you should think about and what this sort of creation will result in.
.
Keywords: creativity, motivation, self-learning,  autodidact, critical thinking, proactive thinking (learning from fails for the future…), engaging, competences, PracTICE skills, learning-By-Doing, learning to learn, problem solving , organization skills, team work, coaching, fun, gift from kids to parents for Xmas, feeling proud about having created something itself, self-esteem…
.

.

GUST-AVRIL2014-800px-2L’auteur Gust MEES est Formateur andragogique / pédagogique TIC, membre du “Comité Conseil” de “Luxembourg Safer Internet” (LuSI), appelé maintenant BEESECURE, partenaire officiel (consultant) du Ministère de l’éducation au Luxembourg du projet  ”MySecureIT“, partenaire officiel du Ministère du Commerce au Luxembourg du projet ”CASES” (Cyberworld Awareness and Security Enhancement Structure).


The author Gust MEES is ICT Course Instructor, ”Member of the Advisory Board” from “Luxembourg Safer Internet” (LuSI), BEESECURE, Official Partner (Consultant) from the Ministry of Education in Luxembourg, project “MySecureIT“, Official Partner from the Ministry of Commerce in Luxembourg, project “CASES” (Cyberworld Awareness and Security Enhancement Structure).

.

Stay tuned for next blog post(s) 😉

.

.


Tags: , , , , , , , , , , , , , , , , ,