.
.
Rolling Animated Eyes
Since very long I was looking for the How-To of “Rolling Eyes” on a LED-Matrix for one of my projects with Arduino. I found it through my searches on Google on a tutorial using Raspberry PI from “SunFounder”; a tutorial which shows as well the use with an Arduino UNO. So I had a look on Amazon…
Where to buy:
.
How To use the EMO 24×8 LED DOT MATRIX MODULE with the Arduino
The steps are pretty easy:
Step 1. Download the library
Download the library SunFounder_Emo![]()
Step 2. Install the library
Open the Arduino software, and select Sketch -> Include Library ->Add .ZIP Library.
Step 3. Open the example
Go to File -> Examples -> Sunfounder Emo -> emo_animate
Well, as I don’t want to reinvent the wheel, I recommend to you to follow the complete tutorial with screenshots and code explanation below, please:
Link:
For the wiring, check below, please.
.
.
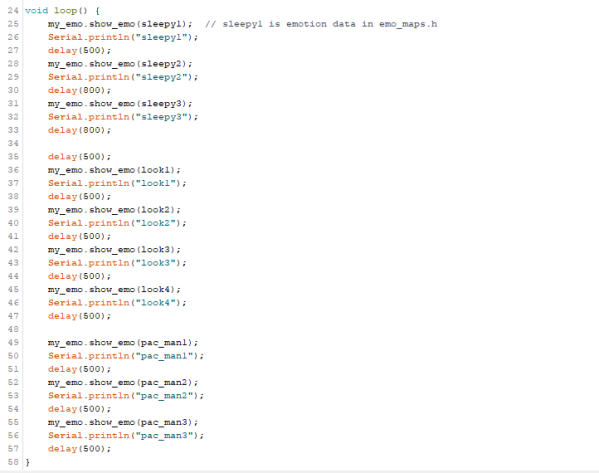
Concerning the code: IF you want just to have the rolling eyes, you need to modify a bit the Sketch (code), BUT it ISN’T difficult at all, JUST to bring in some “//” in some parts of the code. It’s called <===> uncommenting <===> which means THAT that part of code isn’t executed by the microcontroller (Arduino)! THE code as it shows, apart from the rolling eyes, ALSO a PACMAN… Well, YOU decide to keep the code complete and/or ONLY the “Rolling Eyes”… Please check the PICs below.
.
.
In the above PIC you see the part of the ORIGINAL code which is interesting for us.
.
.
In the above PIC we see changes made in the red boxes. We just uncomment several lines by putting a ” // ” in front of the lines of code. The ” // ” is twice a ” / “.
BEST way would be to load and try the original code on the Arduino UNO to find out how it works and later to change the code as shown above.
Have fun by your Learning-By-Doing and stay tuned for next blog posts 😉
You can see the code in action in the video below.
.
.
|
The author Gust MEES is ICT Course Instructor, ”Member of the Advisory Board” from “Luxembourg Safer Internet” (LuSI), BEESECURE, Official Partner (Consultant) from the Ministry of Education in Luxembourg, project “MySecureIT“, Official Partner from the Ministry of Commerce in Luxembourg, project “CASES” (Cyberworld Awareness and Security Enhancement Structure). The author was also a winner of an electronics contest (Germanic countries) in 1979 and got his project published in the “Electronics Magazine ELO”. |
.
Stay tuned for next blog post(s) 😉..
.
Keywords necessary for me to create this project: EMO LED Display, Rolling Eyes, Arduino, Maker, MakerED, MakerSpaces, Coding, Animations on LED Matrix,
.
.


One response to “First Steps with the Arduino-UNO R3 | Maker, MakerED, Coding | 24×8 LED MATRIX | Rolling Animated Eyes”