RSS

Tag Archives: Scrolling Text

First Steps with the Arduino-UNO | Maker, MakerED, MakerSpaces, Coding | Xmas Decoration with Rotating Star using a Stepper-Motor and Scrolling Text with LED Matrix and

First Steps with the Arduino-UNO | Maker, MakerED, MakerSpaces, Coding | Xmas Decoration with Rotating Star using a Stepper-Motor and Scrolling Text with LED Matrix and

.

Merry XMAS

.


Two different projects will become ONE project for Xmas

Well, in previous tutorials <===> https://gustmees.wordpress.com/2019/11/03/first-steps-with-the-arduino-uno-maker-makered-makerspaces-coding-make-objects-rotating-with-a-stepper-motor/ <===> and in <===>  https://gustmees.wordpress.com/2018/04/08/first-steps-with-the-arduino-uno-r3-maker-makered-coding-scrolling-text-with-8×8-led-matrix/     <===> we learned about the how-to to make objects rotating as well as to display a scrolling text on a LED Matrix. NOW, we will combine those two for a nice Xmas decoration.

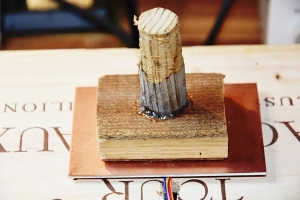
When fixing a small object there isn’t any problem, you just drill a hole of the diameter of the axis of the Stepper-Motor and fix it with hot glue or instant glue. BUT, when it comes to make rotating larger objects it will become unstable!! We need then also a larger support plate to fix the object. I used two techniques, one with a copper-plate of 0.8 mm (was still in my cellar for 30 years…) and/or a single-sided copper-Epoxy plate. Copper-plates are expensive and single-sided copper-Epoxy plates are on a less expensive price. They are about 0.65-1€/piece on Amazon.

For our Xmas project we will use a plastic star with LEDs which will get fixed the following way, check below please.


Single-sided Copper-Epoxy plate

Single-sided Copper-Epoxy plate

Single-sided Copper-Epoxy plate

Click image, please, to enlarge.

Single-sided Copper-Epoxy plate


Single-sided Copper-Epoxy plate

Single-sided Copper-Epoxy plate

Click image, please, to enlarge.


Mounting and fixing of the Stepper-Motor

Fixing the Stepper-Motor

Click image, please, to enlarge.

Mounting and fixing of an object

Support for Xmas decoration

Support for Xmas decoration

Click image, please, to enlarge.

Support for Xmas decoration

Support for Xmas decoration

Support for Xmas decoration

Click image, please, to enlarge.

Support for Xmas decoration

Support for Xmas decoration

Support for Xmas decoration

Click image, please, to enlarge.

.

As Xmas star I used one from Amazon, please check below:

Price is 14.99€, you may as well chose another one.

For the code (Sketch) please look at the following tutorial:

.


Two Projects in ONE

Once the Xmas Star fixed together with the Stepper-Motor, cabled and the the Code tested, WE fix our LED matrix with hot-glue, cabling it and running the Code for a last test:

.


Finished project front view.


Merry XMAS

Click image, please, to enlarge.

Finished project rear view.


Finished project rear view.


Click image, please, to enlarge.


Arduino NANO Screw Terminal

arduino-nano-screw-terminal

arduino-nano-screw-terminal


.

POWER BANK

POWER BANK

.

.


.


Prototype Shield for ARDUINO UNO-3

Prototype Shield for ARDUINO UNO-3

.


.

As a reminder, please check below for the instructions for the LED-Matrix.

.


The cabling, wiring…

.


Rotating Xmas Star with Stepper-Motor and Scrolling Text with LED Matrix

Rotating Xmas Star with Stepper-Motor and Scrolling Text with LED Matrix

.

Please, check above image (photo) where you will see the How-To to implement on an easy wiring way the components.

More explanations to come, stay tuned…

..


.

L’auteur Gust MEES est Formateur andragogique / pédagogique TIC, membre du “Comité Conseil” de “Luxembourg Safer Internet” (LuSI), appelé maintenant BEESECURE, partenaire officiel (consultant) du Ministère de l’éducation au Luxembourg du projet  ”MySecureIT“, partenaire officiel du Ministère du Commerce au Luxembourg du projet ”CASES” (Cyberworld Awareness and Security Enhancement Structure)..


The author Gust MEES is ICT Course Instructor, ”Member of the Advisory Board” from “Luxembourg Safer Internet” (LuSI), BEESECURE, Official Partner (Consultant) from the Ministry of Education in Luxembourg, project “MySecureIT“, Official Partner from the Ministry of Commerce in Luxembourg, project “CASES” (Cyberworld Awareness and Security Enhancement Structure).

.


.

Stay tuned for next blog post(s) 😉

.

.

.

.


Tags: , , , , , , , , , , , , , , , , , , , , , , , , , ,

First Steps with the Arduino-UNO R3 and NANO | Maker, MakerED, Coding | Scrolling text with I2C-LCD1602

First Steps with the Arduino-UNO R3 and NANO | Maker, MakerED, Coding | Scrolling text with I2C-LCD1602

.

Office Notification-I2C-LCD1602

.


Scrolling text with I2C-LCD1602

I was looking for a simple project for beginners, newbies on Coding and MakerED. A looong time ago since we did a project with ONLY four (4) wires, isn’t it! Well here is one which is very easy to create, a “Scrolling text on a LCD1602 with “I2C-Bus”. In previous blog post we were already using and explaining the “I2C-Bus” with an LCD, so it will be easy to create this one…

As a reminder, the I2C-Bus on an LCD1602:

Let us first have a look on the wiring, which is actually very easy.

.

I2C LCD1602 PINOUT-Arduino NANO

Click image, please, to enlarge.

The full tutorial could be found here, which I invite you to read carefully:

In  the tutorial are mentioned also the download link for the code in the upper side of the website, download it and check it; there are some bugs in 😉 I will explain where to look for changing the code, it’s actually very easy, here we GO!

Here the download link again:

The code looks like this (partial view for WHAT is interesting us…).

.

SCROLLING-TEXT-LCD1602-I2C-ORIGINAL-WITH-BUGS

Click image, please, to enlarge.

.

When we look at line 6, it is just a “comment” and so it will result in an ERROR, it should become uncommented by ” // “. In my case I didn’t get any text displayed, so I had a look at line 18 which is ” lcd.begin (16,2);” and I changed it into ===> “lcd.begin (0x3F,16,2);” which worked!! SO, that’s my recommendations, otherwise the Sketch works fine and you can change the lines 9 and 10 where you bring in your own text; NOT more than 16 characters, please 😉 Well, give it a try and find out yourselves…  Here below a screenshot with the working code…

.

SCROLLING-TEXT-LCD1602-I2C-WORKING

Click image, please, to enlarge.

.

Click the image, please, to enlarge it and find the necessary instructions to make the code work correctly, IF you have the same problem as I had.

.


Out of office notification


Office Notification-I2C-LCD1602

Click image, please, to enlarge.


Prices of the used material:


.

Please check video below to see the Sketch in action, e.g.

.

.

SO, now that your sketch is working, play a bit around while changing the variables, such as:

  • delays
  • text
  • etc.

Have fun and stay tuned for next blog posts 😉


.

GUST-AVRIL2014-800px-2L’auteur Gust MEES est Formateur andragogique / pédagogique TIC, membre du “Comité Conseil” de “Luxembourg Safer Internet” (LuSI), appelé maintenant BEESECURE, partenaire officiel (consultant) du Ministère de l’éducation au Luxembourg du projet  ”MySecureIT“, partenaire officiel du Ministère du Commerce au Luxembourg du projet ”CASES” (Cyberworld Awareness and Security Enhancement Structure). L’auteur était aussi gagnant d’un concours en électronique en 1979 ( Pays germaniques ) et voyait son projet publié dans le magazine électronique “ELO”.


The author Gust MEES is ICT Course Instructor, ”Member of the Advisory Board” from “Luxembourg Safer Internet” (LuSI), BEESECURE, Official Partner (Consultant) from the Ministry of Education in Luxembourg, project “MySecureIT“, Official Partner from the Ministry of Commerce in Luxembourg, project “CASES” (Cyberworld Awareness and Security Enhancement Structure).

The author was also a winner of an electronics contest (Germanic countries) in 1979 and got his project published in the “Electronics Magazine ELO”.


Keywords necessary for me to create this blog post: Arduino UNO R3, Arduino NANO, LCD 1602, I2C Bus, coding, learning to learn, learning by doing, trouble shooting, I2C scan, LCD160/I2C, Scrolling Text,

.

.

.


Tags: , , , , , , , , , , , , , , , , , , , , , , , , ,

First Steps with the Arduino-UNO R3 | Maker, MakerED, Coding | Scrolling Text with 8×8 LED MATRIX

First Steps with the Arduino-UNO R3 | Maker, MakerED, Coding | Scrolling Text with 8×8 LED MATRIX

.

page MAX7219

.


Scrolling Text with 8×8 LED MATRIX (4 Modules in One)

MAX7219 LED MATRIX 4 in One

Click image, please, to access the article on Amazon

.

.

.

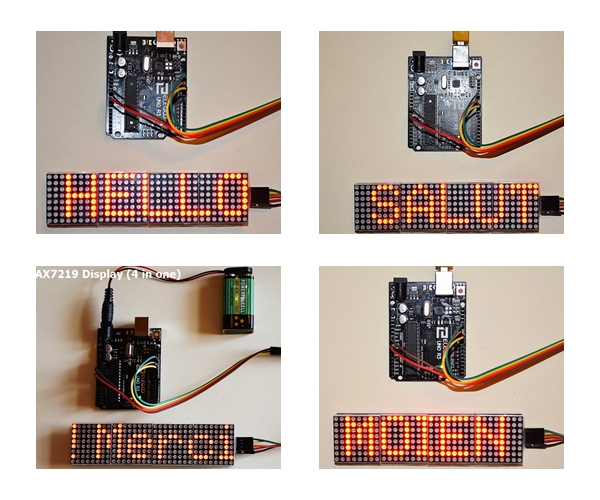
As we were playing around already with LED’s in previous blog posts let us NOW try out a LED Matrix “4 in one”; its four (4) singular displays soldered on one piece of a single printed circuit board (PCB). I ordered the stuff at Amazon (DE) https://www.amazon.de/AZDelivery-MAX7219-Matrix-Anzeigemodul-Arduino/dp/B079HVW652 which is supplied by AZ-Delivery.

.

.

.

.

.

I like their products as they provide ALSO  eBooks in PDF format for their products with quality explications (in German) as also tips; the eBooks can be downloaded here (registration first required):

The Matrix costs also only 12,99€ and therefore worth a try… BTW: I am very satisfied with the product and I ordered two more to make the display longer for my home project. SO, let us start with the wiring scheme, please check below:

.

MAX7219 LED MATRIX 4 in One-Wiring Scheme

Click the image, please, to enlarge.

.

As you can see in above wiring scheme, there are ONLY 5 wires necessary and we use an Arduino NANO (works also with the UNO). Connect those wires as shown above, connect the USB cable to the Arduino NANO and the computer. Now we are ready to load the code, but first we need to install the necessary libraries for the MAX7219-Display. Check below please for the How-To:

.

Upload-Libraries-MAX7219-Display-1

Click image, please, to enlarge.

.

Open the Arduino IDE, click on “Sketch“, followed by “Include Library” as shown in above image.

.

Upload-Libraries-MAX7219-Display-2

Click image, please, to enlarge.

.

Click on “Manage Libraries…“, a new window will open, the “Library Manager“, as shown below.

.

Upload-Libraries-MAX7219-Display-Library Manager

Click image, please, to enlarge.

.

In the Search-field enter„MAX72xx“ and chose MD_MAX72xx from majicDesigns and install it. SO, the libraries (the code for specific Hardware…) are installed, let us GO for uploading the “Sketch” (the code)… We will use a ready example to make us life easy, please follow the instructions in below picture:

.

Upload-Libraries-MAX7219-Display-Sketch-Examples

.

SO, this done close the Arduino IDE and open it again to chose now: GO to “File“, click on “Examples” followed by “MD_Parola” and chose on of the ready examples, WE will use as example “Parola_Scrolling” as it is expressive for results…

.

A new Arduino IDE with the chosen Sketch will open…

.

MAX7219-Display-Sketch-Code in Arduino IDE

Click image, please, to enlarge.

.

In the above image you see WHERE you can have a look for changing the variables, your own text and scrolling-pause. When you use “Notepad++” to open the code (it is more easy to detect the lines to change…) you will find them in lines 66-74

THE values which you see in the above image (screen shot) are mine which I changed already, to me “Scroll-Speed = 150” is the optimum value; but chose your own…

NOW, as we finished everything, let us upload the code to the Arduino UNO, or Arduino NANO.

Have FUN with your “LEARNing-By-Doing project” and try out ALSO the other examples 😉


GUST-AVRIL2014-800px-2L’auteur Gust MEES est Formateur andragogique / pédagogique TIC, membre du “Comité Conseil” de “Luxembourg Safer Internet” (LuSI), appelé maintenant BEESECURE, partenaire officiel (consultant) du Ministère de l’éducation au Luxembourg du projet  ”MySecureIT“, partenaire officiel du Ministère du Commerce au Luxembourg du projet ”CASES” (Cyberworld Awareness and Security Enhancement Structure). L’auteur était aussi gagnant d’un concours en électronique en 1979 ( Pays germaniques ) et voyait son projet publié dans le magazine électronique “ELO”.


The author Gust MEES is ICT Course Instructor, ”Member of the Advisory Board” from “Luxembourg Safer Internet” (LuSI), BEESECURE, Official Partner (Consultant) from the Ministry of Education in Luxembourg, project “MySecureIT“, Official Partner from the Ministry of Commerce in Luxembourg, project “CASES” (Cyberworld Awareness and Security Enhancement Structure).

The author was also a winner of an electronics contest (Germanic countries) in 1979 and got his project published in the “Electronics Magazine ELO”.

.

Stay tuned for next blog post(s) 😉..
.

Keywords necessary for me to create this blog post: Arduino UNO R3, Arduino NANO, MAX7219 LRD DISPLAY, Coding, Maker, MakerED, MakerSpaces…


.


Tags: , , , , , , , , , , ,