.
.
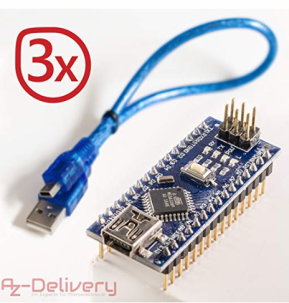
Temperature & Humidity monitor using Arduino NANO + DHT22 + 0.96 inch 128X64 I2C OLED
WE were playing around a lot already with I2C-LCD displays <===> https://gustmees.wordpress.com/?s=i2c+lcd <===> but not yet with I2C-OLEDs. In this tutorial WE will create a <===> Temperature & Humidity monitor using Arduino NANO + DHT22 + 0.96 inch 128X64 I2C OLED <===> which displays the temperature in °F AND °C, as well as it displays the “Heat Index“.
FIRST of all, let us talk about the “Heat Index“, what it is and WHY it could be important to display it:
.
Heat-Index in °C
.
.
Heat-Index in °F
.
.
NO more Theory now, the PracTICE!
Let us have a look on the wiring and check the below Fritzing, please. It shows a DHT11 Sensor instead of a DHT22 Sensor, but the wiring is the same. It shows ALSO a 220 Ohm resistor instead of a 10K resistor!! Use a 10K resistor please!!
.
.
Once finished the wiring, WE will need to go for the coding by using a Sketch, we will use a already done Sketch, which WE can transform to our needs from:
IF you use “°Fahrenheit” you can use it without any changes, but IF you use “°Celsius” in your country WE will need to make some changes in the code, which WE will discuss the How-To here below.
First step: you can change the text, IF wanted: Original says "DHTxx test!", I changed it to what you see below; GET creative ;)
.
.
SO, here below the changes to make to display in “°Celsius“:
.
You might need to add certain libraries, see below please which ones will GET needed, please.
.
.
IF a newbie, please check the below tutorial for the How-To:
.
Well, that ISN’T difficult folks 😉
.
Check the video below, please, to see it in action (Fahrenheit version).
.
.
Check out ALSO, please, the tutorial below about DHT 11, DHT22 Sensors on Arduino and Raspberry PI:
.
Prices and where to order
|
128 x 64 Pixel 0.96 Inch I2C OLED Display
Click image, please, to enlarge. |
Click image, please, to enlarge. |
|

Click image, please, to enlarge.
|
Temperature/Humidity Sensors
|
|
 L’auteur Gust MEES est Formateur andragogique / pédagogique TIC, membre du “Comité Conseil” de “Luxembourg Safer Internet” (LuSI), appelé maintenant BEESECURE, partenaire officiel (consultant) du Ministère de l’éducation au Luxembourg du projet ”MySecureIT“, partenaire officiel du Ministère du Commerce au Luxembourg du projet ”CASES” (Cyberworld Awareness and Security Enhancement Structure).. L’auteur Gust MEES est Formateur andragogique / pédagogique TIC, membre du “Comité Conseil” de “Luxembourg Safer Internet” (LuSI), appelé maintenant BEESECURE, partenaire officiel (consultant) du Ministère de l’éducation au Luxembourg du projet ”MySecureIT“, partenaire officiel du Ministère du Commerce au Luxembourg du projet ”CASES” (Cyberworld Awareness and Security Enhancement Structure)..
The author Gust MEES is ICT Course Instructor, ”Member of the Advisory Board” from “Luxembourg Safer Internet” (LuSI), BEESECURE, Official Partner (Consultant) from the Ministry of Education in Luxembourg, project “MySecureIT“, Official Partner from the Ministry of Commerce in Luxembourg, project “CASES” (Cyberworld Awareness and Security Enhancement Structure). |
.
Stay tuned for next blog post(s) 😉
.
.


