.
.
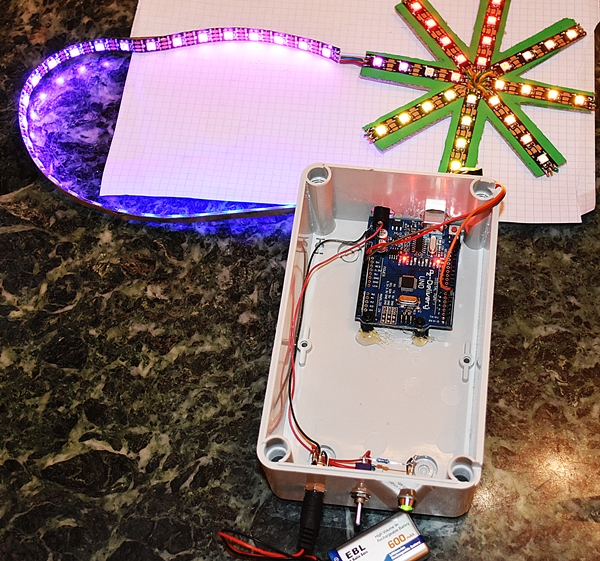
Xmas Star with NeoPixels WS2812B made from cardboard
 Soon there will be Christmas and decorations are getting put around the house worldwide as it is tradition since ages to do so. That’s also the time for tinkerers, makers to GET some new ideas. Well, I thought on a project which everybody could do without having a 3D-Printer NOR a Laser cutter at home and not having access to them on other places. SO, I tried out to create a Xmas-Star from cardboard using an Arduino UNO and Neopixels…
I recently bought 1 Meter of Neopixels WS2812B with 60 LEDs and tried it out while wife was looking at it and she told me if that wouldn’t be an idea for making a Christmas-Decoration, e.g. a star. I took that challenge and a day later it was working, LOL 😉 I used a 3,5 mm thick cardboard from a red wine box which was stable enough to create the project.
The measures are 160 mm x 160 mm and there are 8 segments with an angle of 45° (8 x 45 = 360°). This is quiet easy to draw on cardboard… Once the lines drawn, up from the middle line draw a 1 cm to the left and to the right so that it makes a 2 cm width of each segment. On the middle cut out a square hole from 1,6 cm. That is the perfect outfit for the Christmas-Star. Cut it out with a sharp cutter and paint it with the color of your choice, I used green… NOW take the 1 meter long ribbon and cut off 8 x 4 LEDs. THEN take off the protection paper from the Neopixels WS2812B ribbon and glue them on the cardboard, see PIC please.
Find below, please, a drawing with the dimensions and where to cut out:
You may have a look on this Tutorial to know a bit more about the handling of Neopixel LEDS, please:
The project itself by cabling is actually VERY easy, ONLY 3 wires, the MOST work is on the mechanical part by cutting the cardboard, painting, soldering the Neopixels WS2812B strip and to put everything into a box with the necessary parts, while drilling, etc. WE will see this in detail by following PICS… But first let us solder and interconnecting the 8 x 4 Neopixels LEDs strips, you need to follow the arrows on the strips to connect each of the 8 x 4 LED strips, thus meaning: see PICs please:
.
Please have a look on how this will look in our project; we use color flat cable to make the connections.
.
The flat cable will get fixed with hot-glue on the cardboard.
.
Once the 8 x 4 LED strips are interconnected, you can connect the other 28 LEDs to the point marked with “START” and connect them to the ARDUINO UNO board through a screw terminal to make the first tests. Please check the tutorial below with the code for the How-To:
IF everything is working, hopefully, we can go for the integration of the components into a housing. TIP: prepare the ARDUINO UNO (NANO) already with the code uploaded and test after each 4 LED strips connected to make sure it will work!! it’s BETTER to invest time for NOT later having trouble and NOT knowing from where the fault comes 😉
.
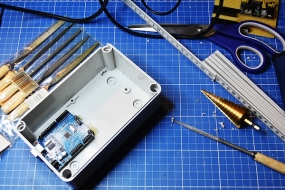
| Housing (case) for Xmas Star
|
Housing (case) for Xmas Star
|
| Housing (case) for Xmas Star
|
Housing (case) for Xmas Star
|
| Soldering inside the housing (case) for Xmas star
Click image, please, to enlarge. |
Soldering inside the housing (case) for Xmas star
Click image, please, to enlarge.
|
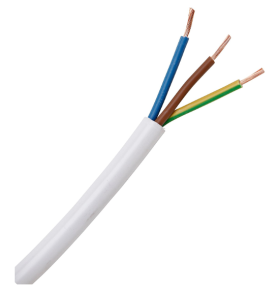
Well, you have seen NOW the different mechanical steps and the soldering inside the housing, that’s the preparation, now we have to connect as well the Xmas star to the Arduino… We will use a 3 x 0.75 mm² cable to do so, find below, please, some PICs which show you the How-To, as well as the components with links to purchase them (I used AMAZON.DE), feel FREE to purchase them where you want:
| Finished housing for Xmas star
|
BTF-LIGHTING 1M 60 LEDs/Pixels/m WS2812B Schwarz PCB RGB adressierbare Strip AMAZON.DE https://www.amazon.de/gp/product/B01CDTEE5W
|
|
2 x 170mm x 105mm x 85mm Waterproof Plastic Enclosure Case Power Junction Box AMAZON.DE https://www.amazon.de/gp/product/B06XDK3GFT
|
Aussel 10 Stück AC 125 V 6A ON-ON 3 Pins 2 Position Mini Kippschalter für Arduino Click image, please, to enlarge. AMAZON.DE https://www.amazon.de/gp/product/B077D9FRGL
|
|
Ehao 20 Stück Kupfer 5mm Leuchtdiode LED-Lampensockel-Montage-Panel-Display Click image, please, to enlarge. AMAZON.DE |
10 Stück Wentronic EDC 21 L DC-Einbaubuchse Stift 2,1 mm,geschl.
Click image, please, to enlarge. AMAZON.DE |
.
| WINOMO DC 12V 1A CCTV Kamera Netzteil EU Stecker (Schwarz)
|
AZDelivery ⭐⭐⭐⭐⭐ UNO R3 mit USB-Kabel, 100% Arduino kompatibel mit gratis eBook! AMAZON.DE |
|
Kopp 151610846 Schlauchleitung H03 VV-F, 3 x 0.75 mm², 10 m, weiß AMAZON.DE https://www.amazon.de/gp/product/B000VDEX2M/
|
AMAZON.DE https://www.amazon.de/gp/product/B01NAKYL5X/
|
.
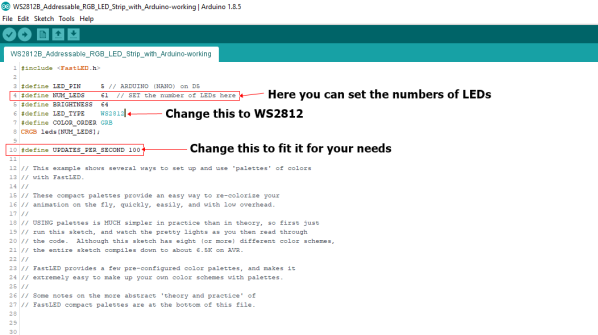
And here the MOST important to make it work, the code:
The code will get downloaded and copy it, then paste it into the Arduino IDE.
.
This is how the code will look and where you can (MUST) modify it, see PIC below please:
.
.
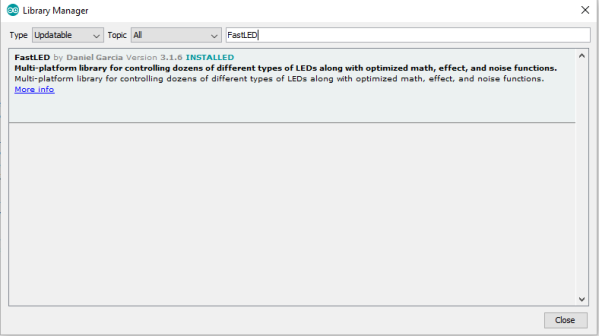
You need ALSO to download and to install the “FastLED.h” Library
.
Download the “FastLED.h” Library here in case of that you will NOT find it in the “Library manager”:
Check also, please:
Have fun and stay tuned for next projects 😉
..
.
 L’auteur Gust MEES est Formateur andragogique / pédagogique TIC, membre du “Comité Conseil” de “Luxembourg Safer Internet” (LuSI), appelé maintenant BEESECURE, partenaire officiel (consultant) du Ministère de l’éducation au Luxembourg du projet ”MySecureIT“, partenaire officiel du Ministère du Commerce au Luxembourg du projet ”CASES” (Cyberworld Awareness and Security Enhancement Structure). L’auteur était aussi gagnant d’un concours en électronique en 1979 ( Pays germaniques ) et voyait son projet publié dans le magazine électronique “ELO”. L’auteur Gust MEES est Formateur andragogique / pédagogique TIC, membre du “Comité Conseil” de “Luxembourg Safer Internet” (LuSI), appelé maintenant BEESECURE, partenaire officiel (consultant) du Ministère de l’éducation au Luxembourg du projet ”MySecureIT“, partenaire officiel du Ministère du Commerce au Luxembourg du projet ”CASES” (Cyberworld Awareness and Security Enhancement Structure). L’auteur était aussi gagnant d’un concours en électronique en 1979 ( Pays germaniques ) et voyait son projet publié dans le magazine électronique “ELO”.
The author Gust MEES is ICT Course Instructor, ”Member of the Advisory Board” from “Luxembourg Safer Internet” (LuSI), BEESECURE, Official Partner (Consultant) from the Ministry of Education in Luxembourg, project “MySecureIT“, Official Partner from the Ministry of Commerce in Luxembourg, project “CASES” (Cyberworld Awareness and Security Enhancement Structure). The author was also a winner of an electronics contest (Germanic countries) in 1979 and got his project published in the “Electronics Magazine ELO”. |
..
Keywords necessary for me to create this blog post: Arduino UNO R3, Arduino NANO, UNO R3 Project, Xmas Star, WM2812B RGB LEDs, Heatshrinking-Tube, coding, learning to learn, learning by doing,
.
.
.
.
